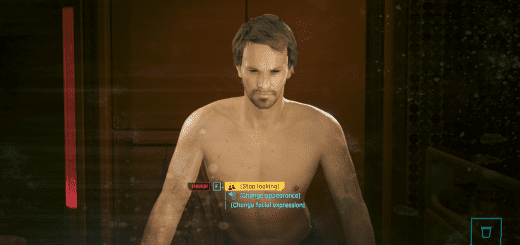
ICONIC – Character Creation Icon Framework
This framework makes it so that every icon displayed in the Character Creation menu can be changed independently of the others, allowing mods that replace these CC options (i.e. eye colors, makeup colors, hair colors, etc) to create custom icons that won’t conflict with each other. It also corrects two duplication errors in the vanilla CC—the bloodshot light blue eye color now uses the correct icon, as does the ragged pink nail color.
Some background on why this framework was created: By default, all of the game’s CC icons are contained on a single sheet, which means if one mod edits that sheet, it will conflict with the edits made by any other mod. This is why most character creation-related mods don’t have custom icons. This framework’s purpose is to make it simple and easy for mod creators to include custom icons with their CC-related mods.
This mod requires Phantom Liberty & game version 2.0+ in order to function properly.
MOD USERS:
You only need to install this mod if it is listed as a requirement for another mod you are installing. It doesn’t do much on its own, though it will fix two duplicate icons and helpfully number all of the options for you.
INSTALLING ICONIC:
– Download ‘ICONIC – Character Creation Icon Framework’.
– Unzip ‘ICONIC – Character Creation Icon Framework’ and drag the archive and r6 folders into your Cyberpunk 2077 installation folder.
UNINSTALLING ICONIC:
– Remove ‘zz_JSILVERHVND_ICONIC_CCIconFramework.archive’ from your Cyberpunk 2077\archive\pc\mod folder.
– Remove ‘JSILVERHVND_ICONIC_CCIconFramework.yml’ from your r6\tweaks folder.
POSSIBLE CONFLICTS:
– If a mod has custom icons but is not made to work with ICONIC (i.e. the mod creator altered the default icon sheet), then ICONIC will prevent that mod’s custom icons from showing up.
– This framework will conflict with any mod that alters the ‘male_cco_ep1.inkcharcustomization’ and ‘female_cco_ep1.inkcharcustomization’ files. I am unaware of any released mods that do so, but will list them here as I become aware of them.
– This framework will slightly conflict with PUSH UP – Enhanced Big Breasts Body Mod (EBBP); about 95% of it will still function, but the duplicate fixes and lip makeup colors’ icons may not.
MOD CREATORS:
I structured this framework to be as simple to use as I possibly could, but please feel free to ask if you have questions.
1. Create your icon textures.
– – There is a template file included on this mod page that you are free to use.
– – If importing textures via WolvenKit, you may need to change the TextureGroup to ‘TEXG_Generic_UI’ in order for it to display correctly. Or you may not! Most of the fallback icons were imported without changing the settings, but in actual use I couldn’t get custom hair color icons for a mod of mine to work without using ‘TEXG_Generic_UI’ instead… Wack!
2. Place your icon textures at the filepath of the option you are replacing. All filepaths are listed below, and have been numbered according to how they appear in the Character Creator.
3. Pack your mod.
4. Be sure to name your mod archive so that it loads above the ICONIC framework file, or else your icons will not show up.
5. When uploading or sharing your mod, please direct users to install ICONIC – Character Creation Icon Framework as a required mod.
SOME NOTES:
– “Freckles” and “Cheek Makeup” are technically the same option (listed under “Cheek Makeup”) in the CC, but because their color swatches are completely different it felt odd to number the first four (the colors of the freckles options) 1-4, then continue 5, 6, 7… and so on for the actual makeup options. Hence, they have been split into their own categories of “Freckles” and “Cheek Makeup”.
– Lip makeup colors have also been split based on the makeup style: “Default”, “Glossy”, and “Matte”. This is because each style has its own set of color files to alter, so it is possible to (for example) replace the colors of the “Default” style without touching “Glossy” or “Matte” — and it would be misleading to change the icons if you didn’t change those, so each option has its own set of icon textures.
– “Hair Color” icons will affect the icons for the following options: Hair Color, Eyebrow Color, Beard Color, and Eyelash Color. This is because all of these assets point to the same color files by default, so replacing one will replace the color for all of them.