

LUT Switcher (Custom Pack Support – LUT Adjustments) v1.1.0
Realtime LUT switching! Features LUT pack support, collapsible categories, favorite lists, and CET hotkey to toggle active LUTs. Future plans in description!
Switch LUTs in realtime with this CET mod. Features LUT pack support, collapsible categories, favorite lists, and CET hotkey to toggle active LUTs. Supports both SDR and HDR LUTs.
Active LUTs are saved and reapplied upon reloading.
This mod was originally created to help users compare LUTs for downloading to use in their games and soon advanced to saving active previews and replacing the need for LUT downloads altogether. No longer will you need to relaunch the game in order to switch things up; click away anytime!

Installation:
Manually install by just dragging and dropping the contents of the zip to the Cyberpunk 2077 root folder.
– For GOG it should be something like “C:\Games\Cyberpunk 2077\[it goes here]
– For Steam it should be something like “C:\Games\Steam\steamapps\common\Cyberpunk 2077\[it goes here]
Making a LUT Pack:
Download the WolvenKit project template in the misc file section. Extract the folder to your PC and open the WolvenKit project file.
You will see three main groups of files, the name_of_lut.effect files in the custom folder, name_of_lut.xbm files in the rename_this folder, and the rename_this.json. Here is an image of the project template.
Start by renaming the name_of_lut.effect files to the name of the LUT. Then rename the rename_this folder containing the name_of_lut.xbm files. Then rename the rename_this.json file found under the resources folder.
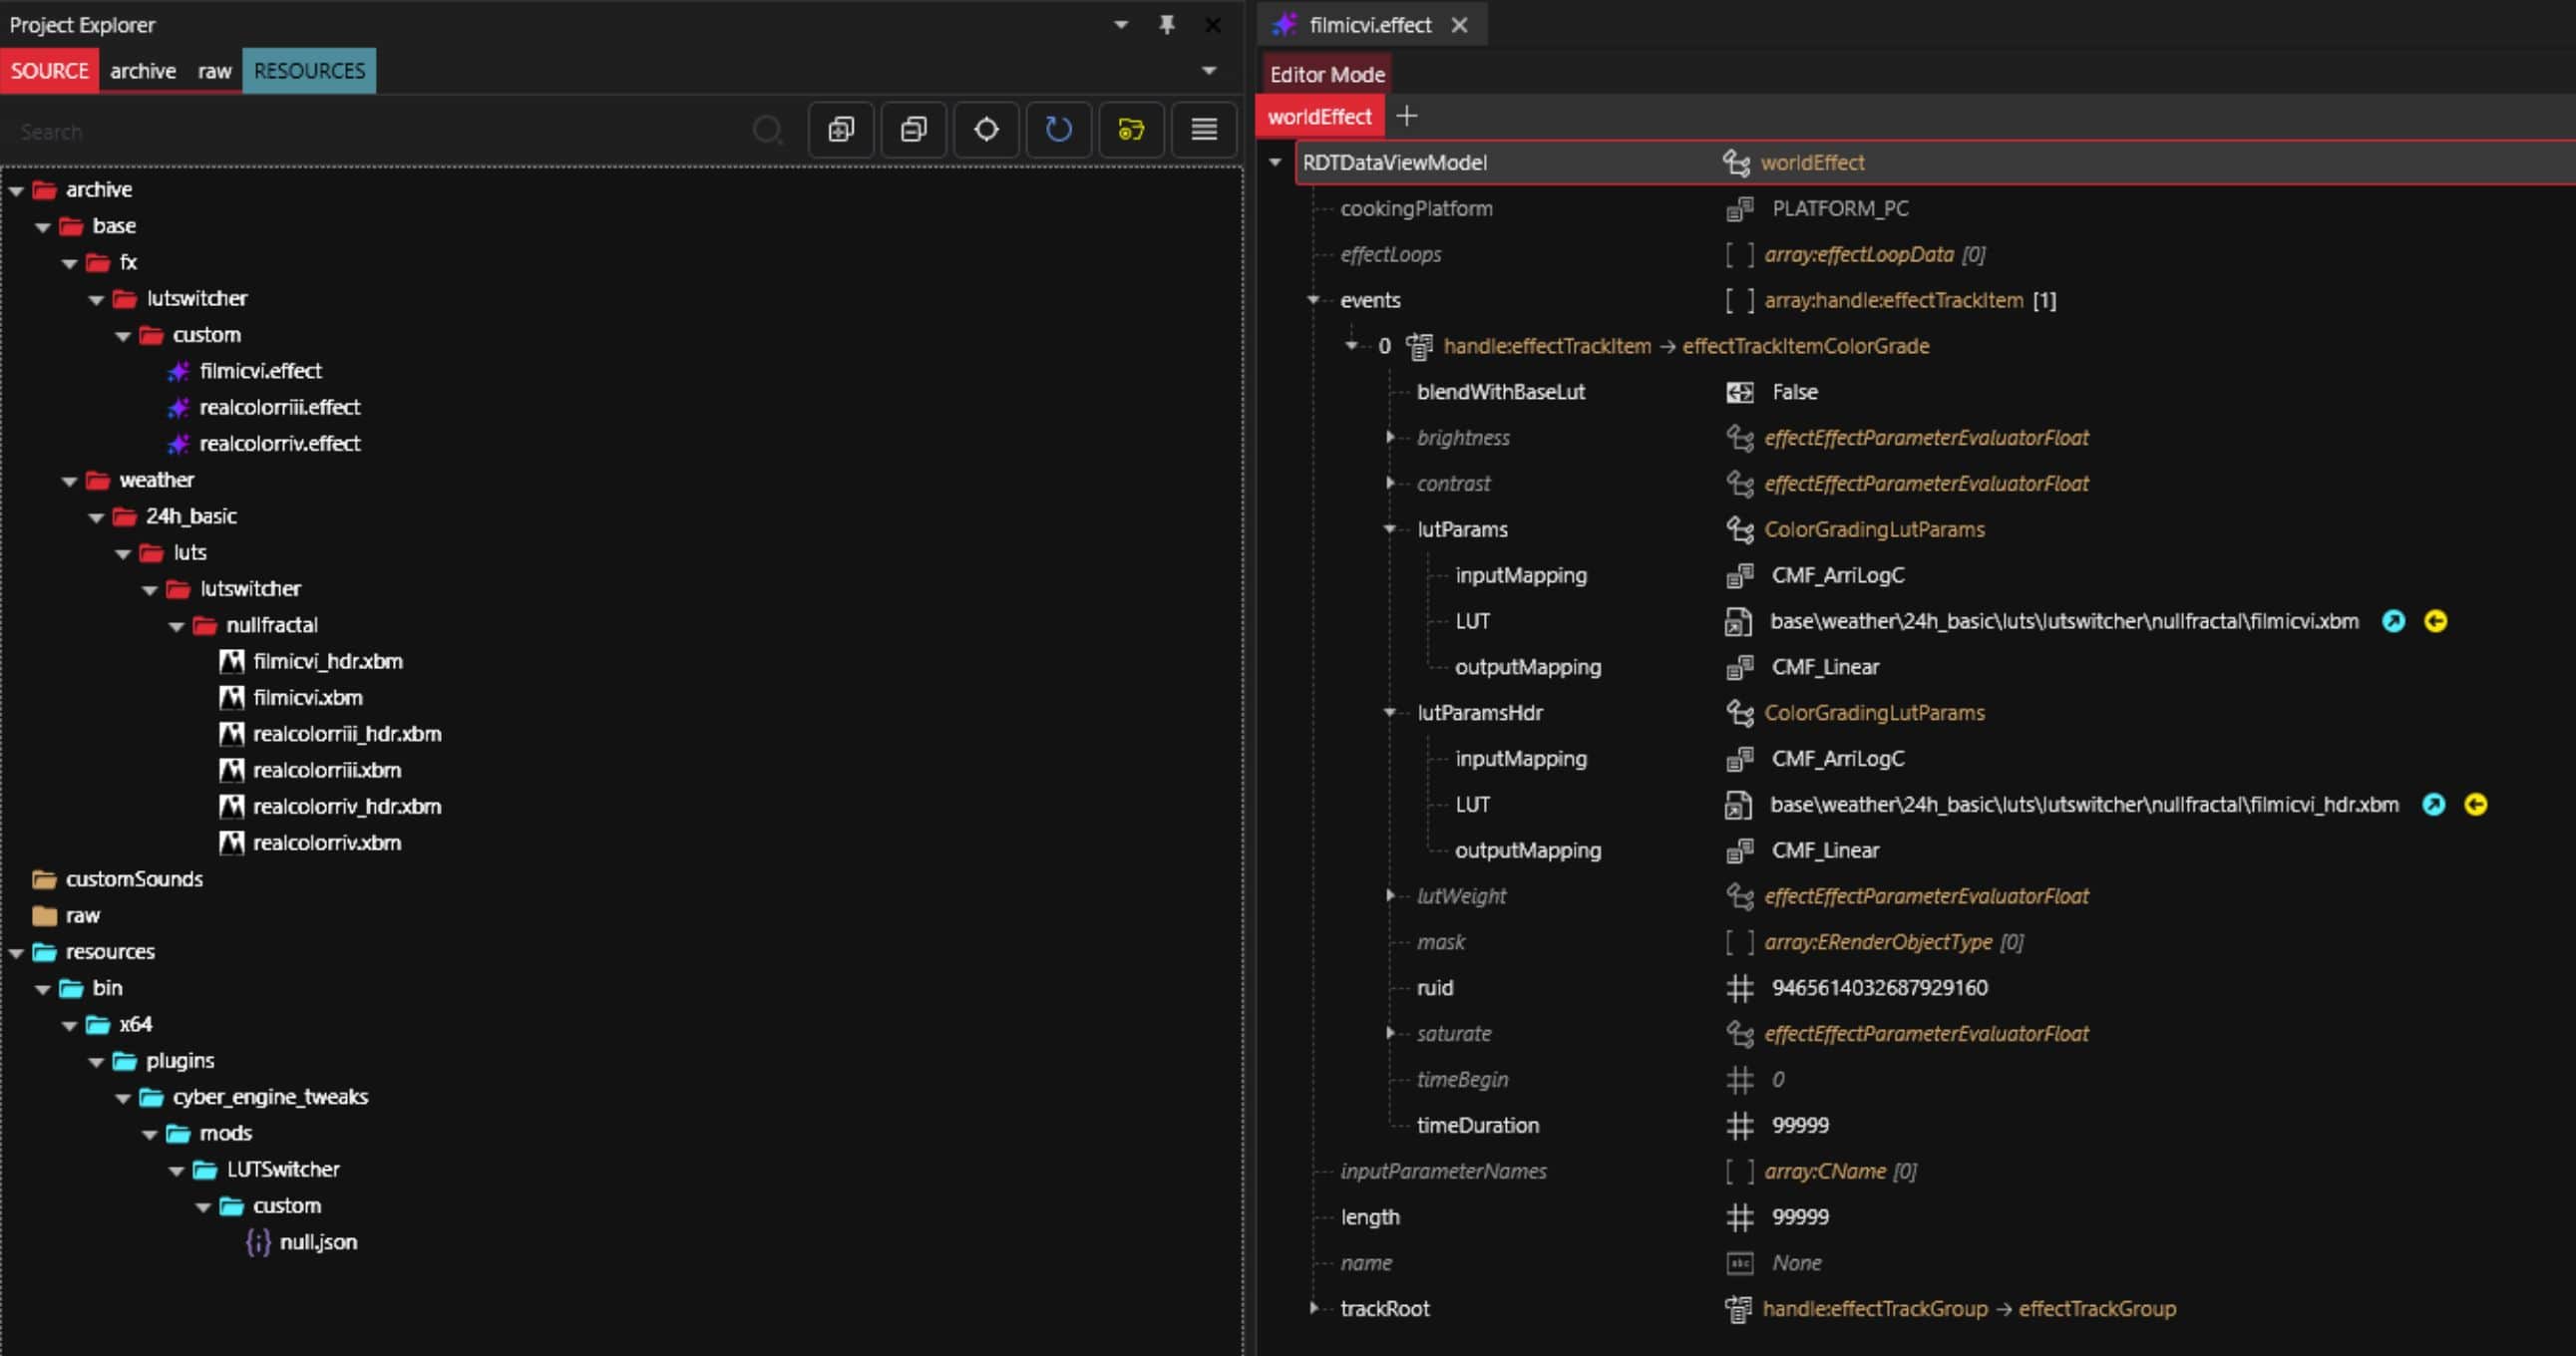
Replace name_of_lut.xbm (and the HDR variant) with your own custom LUTs (make sure to name them). Open the .effect file in your project explorer panel found in base/fx/lutswitcher/custom, expand events, expand 0, and then expand both lutParams and lutParamsHdr. Right click your custom LUT .xbm file in your project explorer panel and ‘Copy relative path to game file’ then paste that into the .effect file under the lutParam > LUT path. Do the same for the HDR version. Save the effect file.
Open the .json file in the resources folder and read the commented lines. If you only have one pack, delete the “CustomPack2” entry. If you only have one LUT, remove the second LUT from the first pack. Rename your pack, LUT Name, and replace name_of_lut.effect with the name of your LUT effect found in the base/fx/lutswitcher/custom folder.
Delete all comments and save the json file. Make sure the location path uses double backslashes (\\). If you only have one LUT entry, this is what your json should look like:
{
“Awesome”: [
{
“name”: “Cool LUT”,
“location”: “base\\fx\\lutswitcher\\custom\\coollut.effect”
}
]
}
When you’re done, your project should look something like this:

Click Build > Pack Project to get a .zip of your mod to share or simply click install mod to install it to your game.
Compatibility:
This mod has no known compatibility issues.
Known Issues:
Some effects in game may override the active LUT (ie. falling from a high place). I will add fixes as they’re discovered and can be downloaded in the update files section.


